5. Dynamic processing: The compressor and other tools
One of the most important tasks in mastering is an exact control of levels. While the fader is the most basic tool for this purpose, it is often necessary to control the dynamic range—the difference between loud and quiet sections within a piece of music. Therefore, mastering almost always includes compression, and lots of it! This ensures that the listener isn't tempted to increase the volume during quiet passages, only to have to turn it down again for louder sections. Ideally, the listener will be able to keep the volume at the same setting throughout the piece, be it in a club, on headphones while riding the tube, or on the radio in an old, noisy car. The master has to function universally—not an easy task!
Compressors aren't all alike, and it is desirable to have a choice. Optical compressors tend to react rather slowly. Their particular behaviour makes them ideally suited for strong, but inconspicious compression. Compressors without optical couplers can provide very fast adjustments. The signal path can be designed with various components such as transistors, tubes, and transducers, each of which have distinctive sonic characteristics.
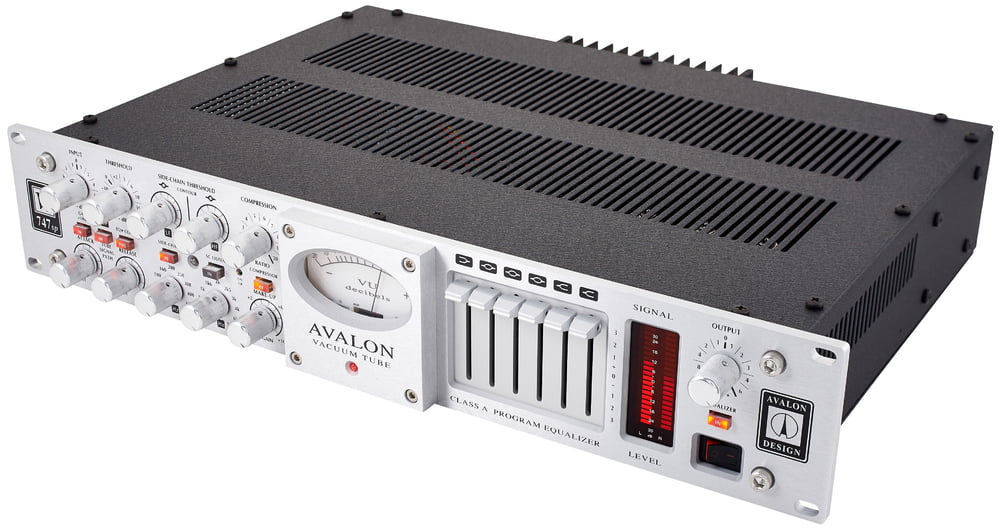
Avalon VT-747SP Stereo Tube Spectral Opto Compressor
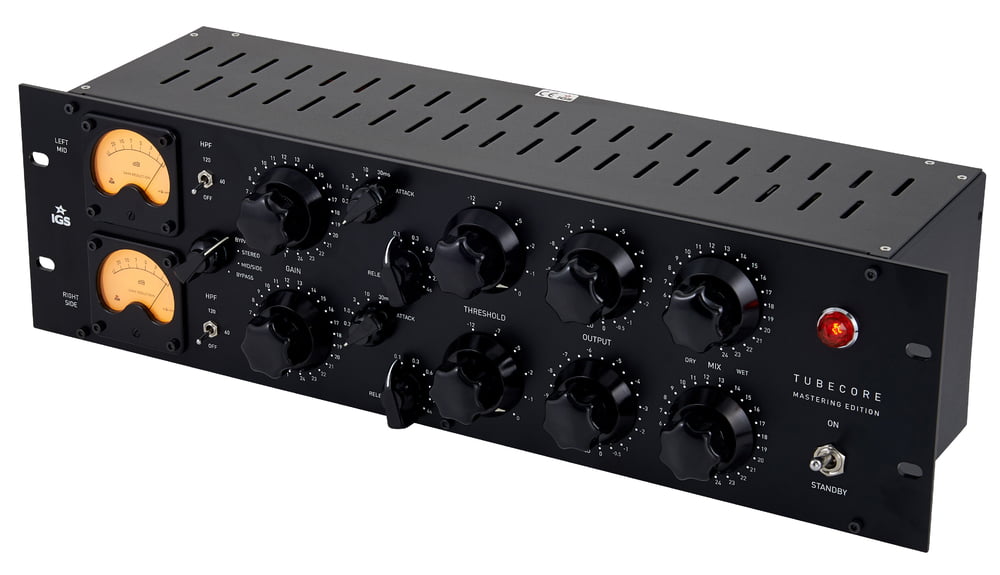
IGS Audio Tubecore Stereo Mastering Compressor
Compression Parameters
Threshold Level
When the input level exceeds the selected threshold, the attack time begins, after which the compressor begins to reduce the level by the selected ratio. Since this would lead to an output level lower than the input level, most compressors have an output „make-up gain“ control, which is used to compensate for the loss in level.
Auto Gain
By selecting the auto gain feature, the make-up gain is automatically set to „threshold minus (threshold divided by ratio)“. Thereby, a normalised input signal will yield a normalised output signal, regardless of the settings for threshold and ratio—at least if the signal is reasonably static.
Attack and Release
The attack time is the time it takes the compressor to react to signals which exceed the threshold. The maximum gain reduction is reached after the attack time has elapsed. Longer attack times preserve transients like the pluck of a guitar string. The release time determines how quickly the compressor stops reducing the gain, after the input level falls below the threshold. If you encounter undesired „pumping“, increase the release time.
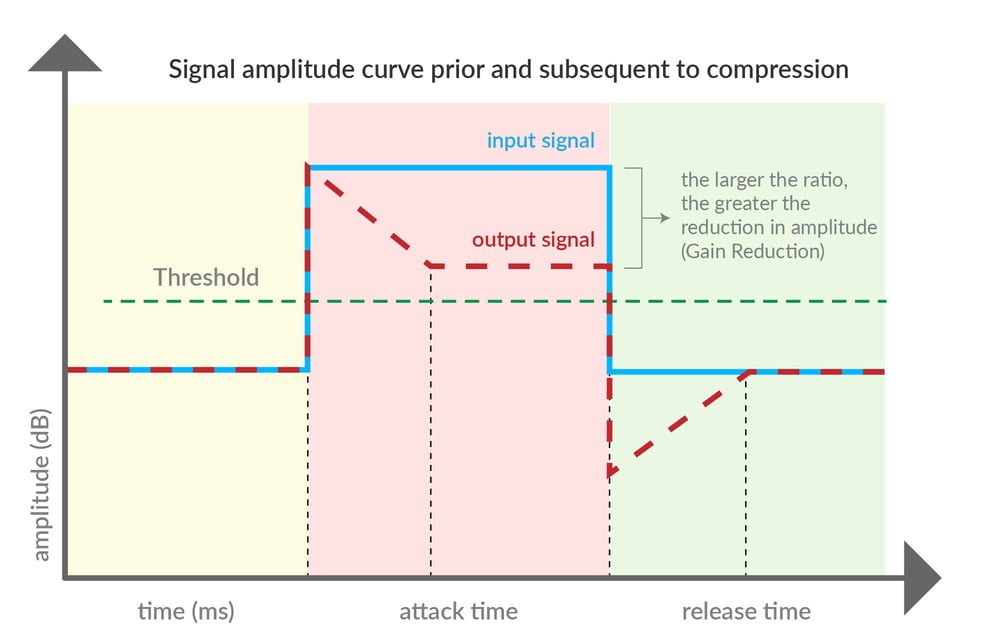
Input- vs, output level
Compression Ratio and Hard Knee vs. Soft Knee
The ratio parameter controls the proportion by which changes in level are reduced after the input level exceeds the threshold and the attack time has elapsed. A ratio of 4:1 means that a level increase of 8 dB at the input produces a level increase of 2 dB at the output. The gain reduction meter shows how much the signal is attenuated at any given time.
If the compressor starts to reduce the level at the set ratio right at the threshold, while the signal passes at a 1:1 ratio just below the threshold, it is referred to as a „hard knee compressor“. It has proven to be sonically beneficial if the transition from a 1:1 ratio to the set compression ratio happens more gradually, so that the compression graph transitions smoothly from the lower left to the upper right. This is called „soft knee“. Some compressors let you adjust the knee with a dedicated control. Remember that „knee“ only describes the characteristics of the compression, not the amount, which is controlled by threshold and ratio.
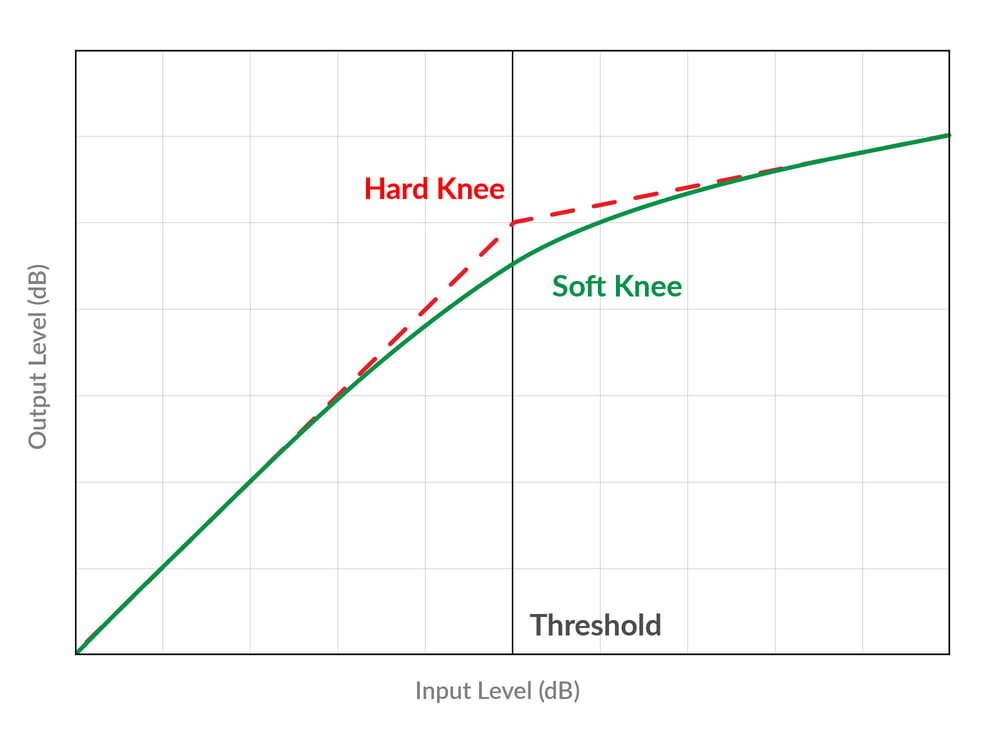
Hard Knee / Soft Knee
Peak/RMS Switch
In order to determine whether the input level exceeds the threshold, a compressor can either look at the true peak level or go by the RMS level, which is an average value that corresponds to the perceived loudness. Using the auto gain feature in conjunction with the RMS characteristic can lead to excessive output levels! If this happens, deselect auto gain and set the gain manually.
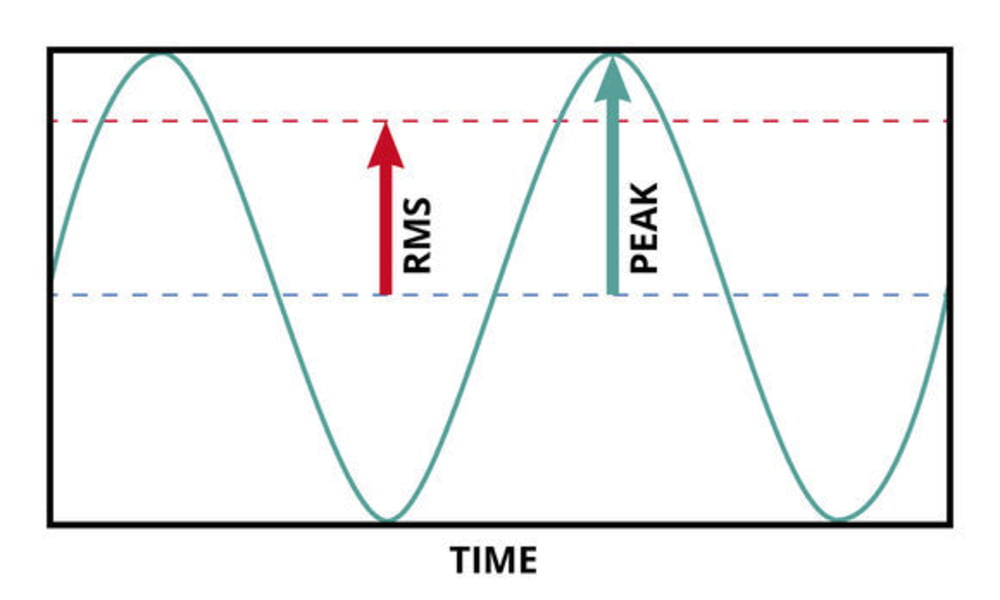
RMS/Peak
Parallel Compression
Parallel compression is a technique used in mixing as well as in mastering. Instead of compressing the entire signal, a portion of the signal is allowed to pass through unaffected. This can make a mix sound more „airy“ and natural.
Limiter
While a compressor is commonly used with a medium threshold and longer, inconspicious reaction times, a limiter is designed to „cut off“ peaks and allows for a louder overall level. A good limiter lets you raise the overall level by several dB almost unnoticably.
If two songs with different loudnesses are played in succession, most people subconsciously perceive the louder sounding one as „better“. In the past, this has led to the so-called „loudness war“, during which engineers tried to make tracks sound louder and louder. Among other things, this requires aggressive limiting of the dynamic range. The downside of this quest for maximum loudness is an increased risk of distorting the signal, compressing it unnaturally and ultimately making the music hard to listen to. Use good judgement!


