4. Positioning
Whichever miking technique you opt for, the position of the mics can make a huge difference to the sound even very small movements can radically alter the tone. Your eyes can be deceptive however - a great way to position mics is to close your eyes and monitor on a good pair of closed-back headphones. Let your ears be the judge of what sounds best, as the most odd-looking position can often work very well.
Mono
The mic should generally be aimed at the area where the neck joins the body, at a distance of around 30cm. This can be increased to 60cm or more, but only in a good sounding, quiet room. Pointing the mic slightly towards the left hand will help to capture more detail, whereas a softer sound can be achieved by pointing towards the sound hole, but this may give too much bottom end unless you also raise the mic vertically by a few centimetres. As always, listening is the key!
Pseudo Stereo: Multi-mic
There is no other single mic position that gives as consistently good results as the area around the neck joint. However, a second mic is often employed, pointed towards the area around the bridge - this position tends to sound rather thin and nasal on its own, but a large diaphragm mic can add warmth. By blending this with a small diaphragm mic in the traditional position and panning left and right, you can achieve a big, wide sound. The bridge mic is generally mixed lower than the neck/body mic, but the beauty of this technique is that by recording to separate tracks, the balance and overall character can be adjusted at mixdown.
True Stereo: X-Y Pair
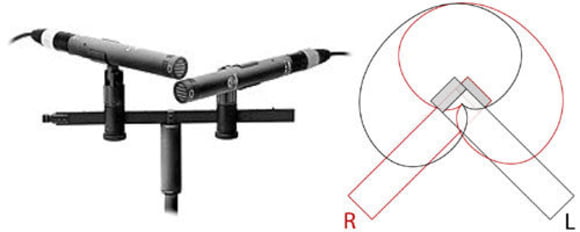
True stereo techniques can also be used to good effect. The most obvious is the X-Y pair, where two cardioid microphones are placed with their capsules as close together as possible, one just above the other, at an angle of approximately 90 degrees.
Positioning can be critical here. Getting the best neck/body sound at the same time as the best bridge sound can be tricky. Small variations in the angle between the mics and overall distance can have a significant effect. Again, keep listening as you go.
True Stereo: Mid & Side Recording
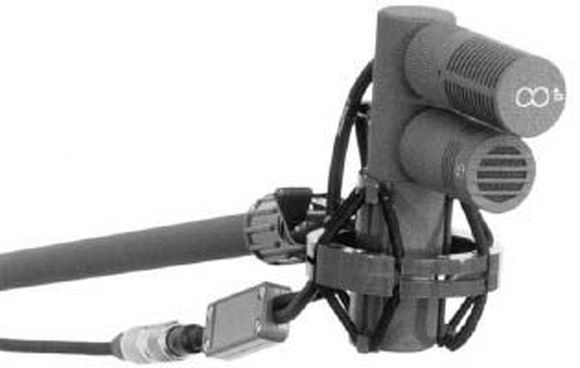
In the standard version of this stereo recording method, a cardioid or supercardioid microphone is pointed towards the source, and a figure-8 mic is placed at 90 degrees, directly above or below.
The mid (mono) signal comes from the cardioid mic. The side signal from the figure-8 mic provides phase and level information for the stereo image. A complete stereo signal is achieved by splitting the side signal and feeding it to two channels, one of which is phase inverted. These two channels are then panned hard left and right, while the mono signal is panned centrally - the stereo image widens as the level of the side signals is raised relative to the level of the mid signal.

M&S recording can produce a very coherent stereo image, and unlike other stereo recording methods, it is completely mono compatible, which is important for TV and radio. When a M&S recording is summed to mono, the side channels cancel out completely, leaving just the central mono signal. For this reason the M&S array should be positioned as though it were a mono mic. As the side mic is not pointing directly at the instrument, this technique can introduce unwanted colouration and background noise, and its selection therefore depends much on the ambient noise level and sound of the room.
Some mixers and mic pre-amps feature integrated M&S decoding. This is convenient, but not essential as long as you have a phase switch and some way to split a signal. This can be done very easily with most hard disk recording software.
N.B. Many close-miking techniques can be given added ambience by using an additional mic placed further back to capture the sound of the room. This technique should never be used with M&S recording however, because the stereo picture is entirely a product of phase relationships between the M and S channels, which an ambient mic signal will confuse and usually completely destroy. For the same reason, the two side faders should always be set at exactly the same level and moved together the easiest way to ensure this is to use software or an automated desk to group them.


